LED Lighting For Photography: Tips And Tricks
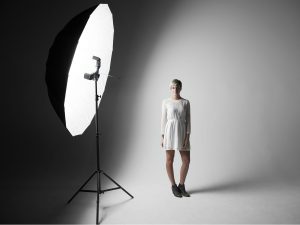
Whether it’s shooting portraits in the studio or stills in the outdoors or even in the interior of a building, all photographers cherish the ability to manipulate various aspects of light falling on the subject of the shoot as well as the background. By doing so a photographer can get the exact exposure, detail, and essence of the photo they want to capture.
With recent improvements in the technology as well as its cost-effectiveness compared to other types of lighting LED photography lights have become the number one go-to solution for lighting during photo shoots.
This is primarily because they afford the photographer the freedom to get complete creative control of the scene’s lighting conditions as well as the ability to play around with various colors of light to get their desired shot.
Nonetheless, it takes some doing to master the art of using LED camera light to set and capture the photographs as desired. In order to develop an intuitive feel for your shooting technique using LED lighting, here are a few tips and tricks you can utilize to perfect your style of shooting gradually.
Scout Your Scene Before Deploying Your Lights
 For professional photographers, quite a substantial amount of their work gets conducted outside the studio. As a result, it is essential to conduct a preliminary visit to the shooting scene. This will allow you to get a feel of the ambient light as well as determine the kind of LED lights to use because different lighting conditions require different lights altogether.
This will also provide adequate time to create a mental picture of the scene you want to create as well as where and how to place the lighting you intend to use so as to have a harmonious blend of ambient and LED continuous lighting.
Don’t Over Complicate Your Lighting
Common mistake novice photographers make is overusing LED lighting on a subject which results in the clash of too many light elements thus making the photo seem unnatural.
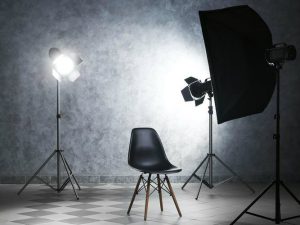
Before deploying the LED lighting, it is advisable first to consider the kind of lighting you want. For instance, in a studio, you can eliminate natural light and use only the lighting setup. However, in the outdoors, you will have to incorporate and adjust your LEDs to blend in with the natural light if you want to get accurate colors.
Hence, when using LED lighting always start with a single light and gradually add more setups as needed. For instance, you can start by setting up the main lighting theme you want for the scene, followed by the use of reflectors to provide fill light then finish off with the background lighting.
Additionally, when shooting in the open, LED panels paired with reflectors have proven to be very useful in filling in the shadows especially when shooting in natural light. When doing this, it may be advisable to avoid or turn off any additional artificial light to prevent white balance issues.
Switch The Lights Around Not Your Subject
In photography, it is always best to create the scene around the subject as opposed to modifying the item to suit the scene. As a result, when using multiple LED lighting setups, it is best to move the lights around your subject to get the desired exposure.
LEDs area great source of continuous light and thus irrespective of how you place the lights what you see is what you expect to capture. Accordingly, you can modify the shadows, intensity as well as exposure of the photo by merely moving the lights to create the scenery you want around the subject.
When photographing in the outdoors, it is best to set up your LED lighting in a manner that complements the natural light. Nonetheless, if this is not your style, you may consider shooting in the early morning hours or in the evening when natural light is not too intense.
Learn And Make Use Of Color Rendering Index (CRI)
 The CRI is essential when determining how to apply the LED lighting with respect to how you want the lights to provide accurate hues, textures and even colors on the subject.
Modern LED lights come equipped with adjustable color temperate and intensity as well as adequate color ranges that enable one to get 3000k to 7000k continuous tuning depending on their preferred match for the scene.
To the human eye color temperature is not an issue, but for a camera, it is essential to get the right levels else the photos appear to have a different color and shade especially when using different colored LED lighting.
When choosing LED lights for photography, the higher the Color Rendering Index, the more accurate the capture should be with respect to the selected light source. However, if you want to play around with the colors, you can choose a medium CRI that allows a little bit of color distortion so as to provide you with the tone you want.
Final Thoughts
LED lighting has enabled photographers to enhance their creativity when capturing various subjects in different lighting conditions. As a result, a photographer can alter the ambiance of the scene which subsequently enables them to modify and adjust numerous aspects of the images they capture to their preference.
However, despite providing the creative edge many photographers seek in their work, LED lighting can be daunting to use particularly in the case of a beginner who has yet to master the delicate settings required to create the desired light settings.
Though there are many factors to consider when using LED lighting for your photography, the above tips should act as the foundation upon which a novice photographer can build and nurture their skill.
Experimentation is the key to better shoots.
As a result, if you are a photographer looking to apply LED lighting in your shoots, try different combinations of lights, reflector panels angles, diffusion frames Color rendering indices, background lighting, etc. until you get a feel for what to use for various lighting conditions as well as environments.